Here's a little secret that separates videos that look "homemade" from videos that look like a brand: it's almost never the camera. It's the light. Lighting is the wardrobe and makeup of the video world — it's how you dress a face so it looks its best on screen. And the good news? It's one of the cheapest upgrades with the biggest payoff.
You don't need a truck full of gear to light an interview well. You need to understand a few simple ideas and arrange them on purpose. Let's break down how the pros make people look great on camera — without the jargon.
First, Fall in Love with Soft Light
Before we talk setups, understand the single most important concept in lighting: soft light is flattering, hard light is not. Hard light is the harsh noon sun — it carves deep, unflattering shadows and shows every pore. Soft light is an overcast day, where the light seems to come from everywhere and wraps gently around a face.
Here's the rule that makes it click: the bigger the light source (relative to your subject), the softer the light. A bare bulb is tiny and harsh. Push that same bulb through a big diffusion panel — or a bedsheet, or a softbox — and suddenly it's large, gentle, and beautiful. Whenever a light looks too harsh, your instinct should be: make it bigger or move it closer.
The Three-Legged Stool: Three-Point Lighting
The professional standard for interviews is three-point lighting, and the name says it all — three lights, each with one job. Think of it like a three-legged stool: each leg does something different, and together they hold everything up.
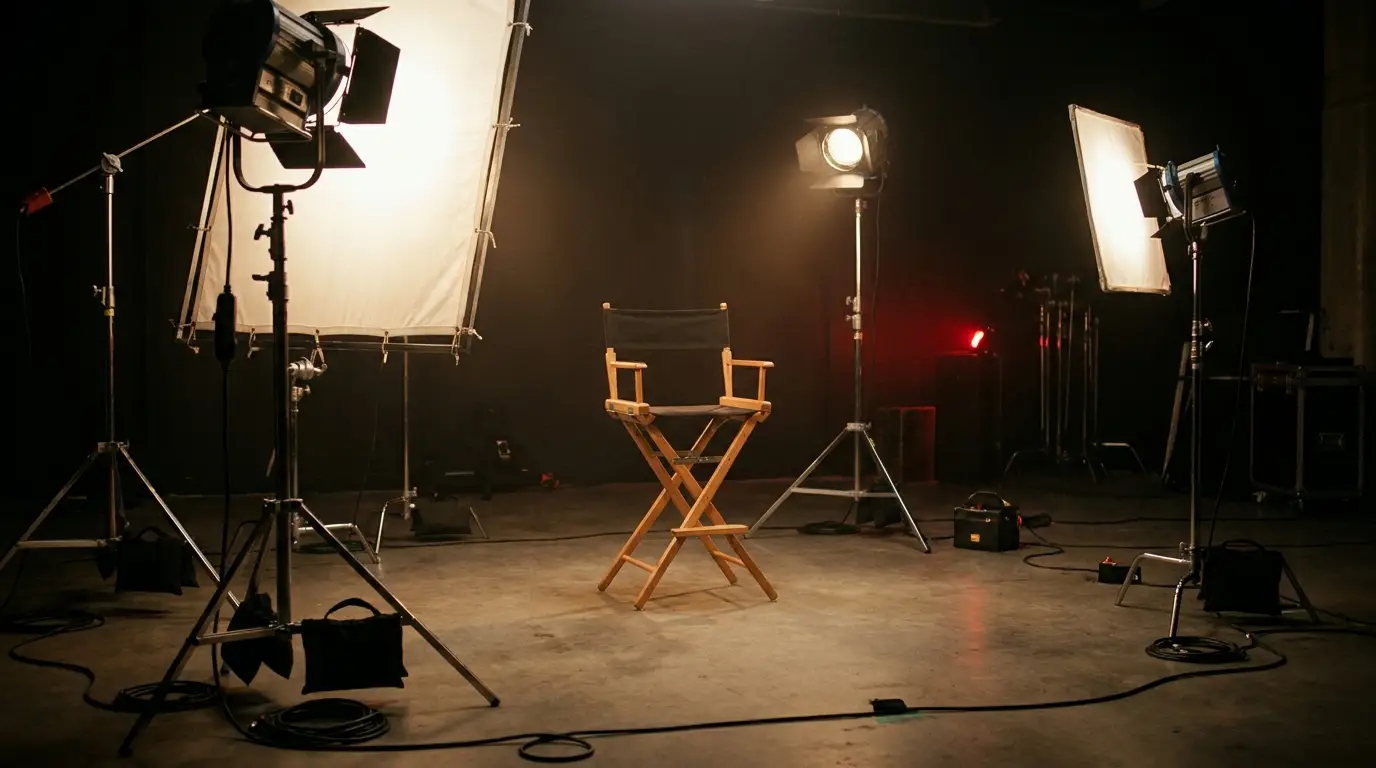
1. The Key Light — Your Little Sun
The key light is the star of the show: your brightest, main source. Place it to one side of the camera, roughly 45 degrees off your subject and a bit above eye level, angled down. This is the sun of your little universe — everything else just reacts to it. Make it soft (see above) and you're already 80% of the way to a great look.
2. The Fill Light — The Shadow Eraser
The key light creates shadows on the far side of the face. The fill light gently erases the harshest of them — but only partway. Keep it soft and about half as bright as your key (pros call this a "2:1 ratio"). No second light? A simple white foam board bouncing your key light back onto the shadow side works beautifully. The goal isn't to erase shadows entirely — a little shadow is what gives a face shape and depth.
3. The Backlight — The Halo
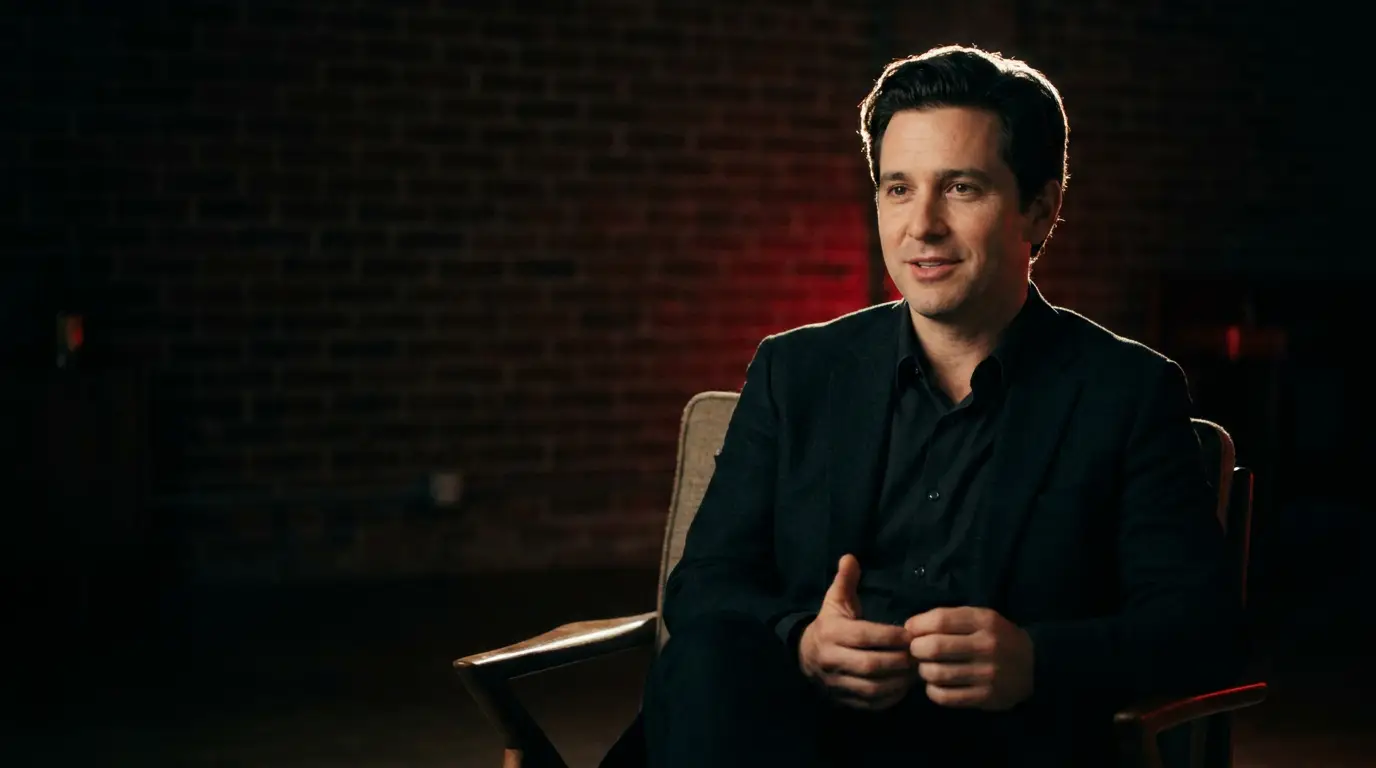
The backlight (or "rim light") sits behind your subject, pointed at the back of their head and shoulders. It creates a subtle glowing outline that separates them from the background — like gently cutting them out with scissors so they don't melt into the wall. It's the most-skipped light by beginners and the one that instantly makes footage look "pro."
The Easiest Win: One Big, Soft Light
If three lights feels like a lot, start here: one large, soft key light placed slightly to the side, plus a bounce board for fill. That's it. A single flattering source beats three badly-aimed ones every time. Master one light before you add the next — you'll be amazed how far a window and a white poster board can take you.
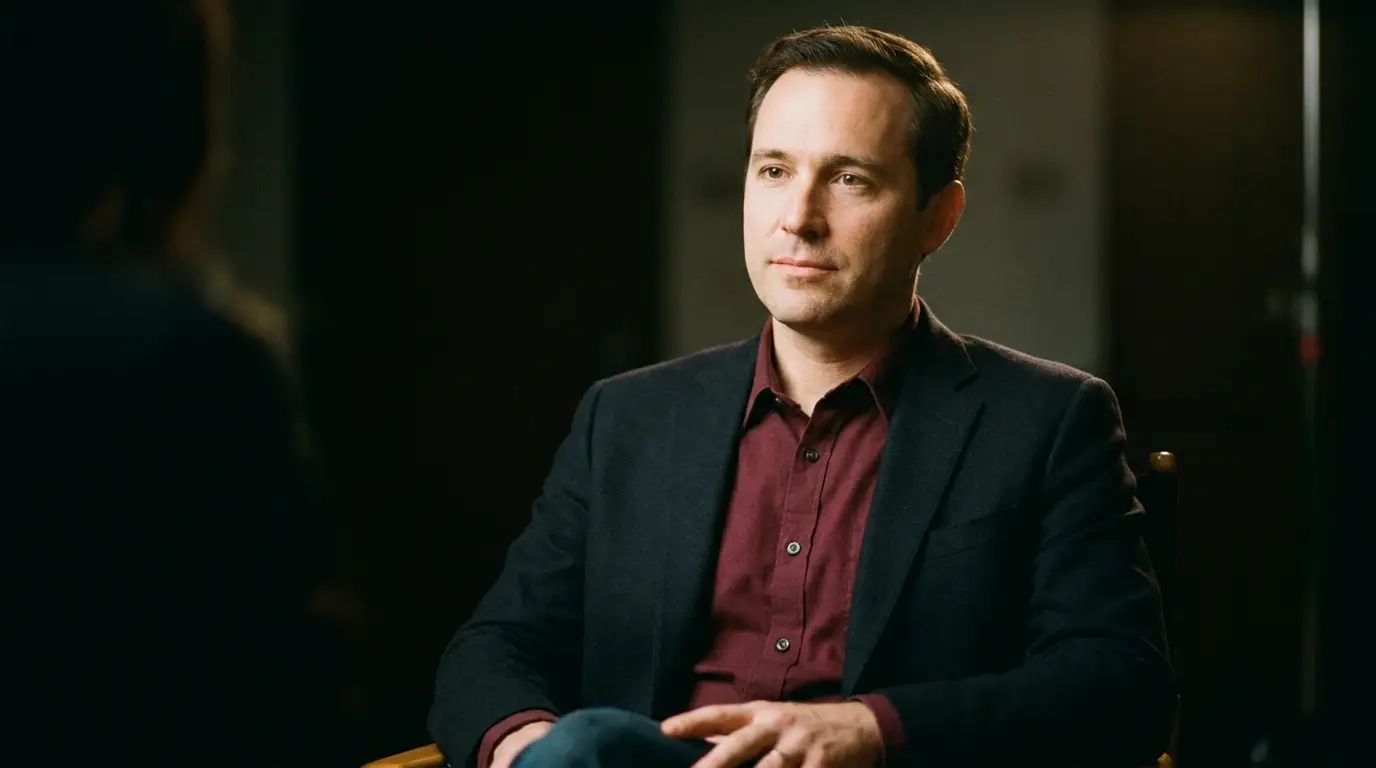
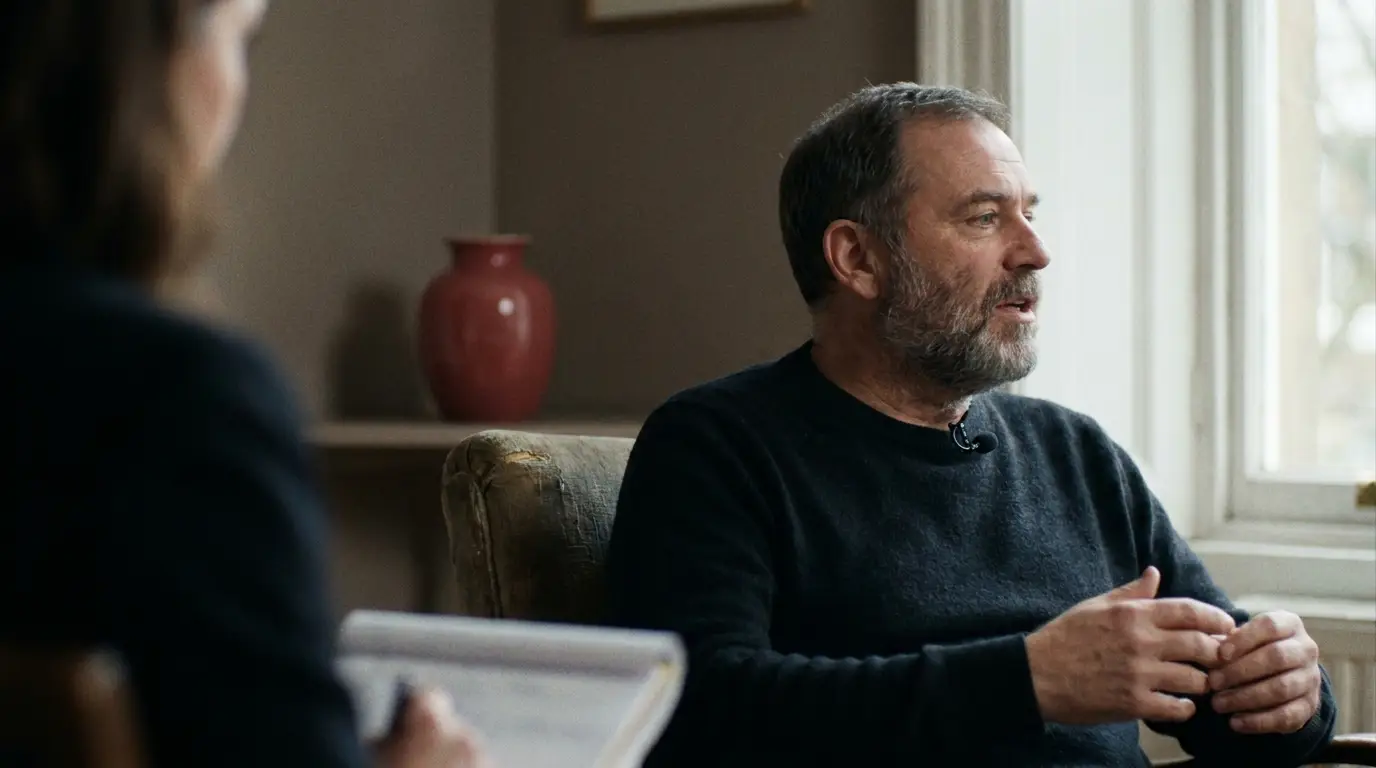
Setting the Mood: Bright & Friendly vs. Dark & Dramatic
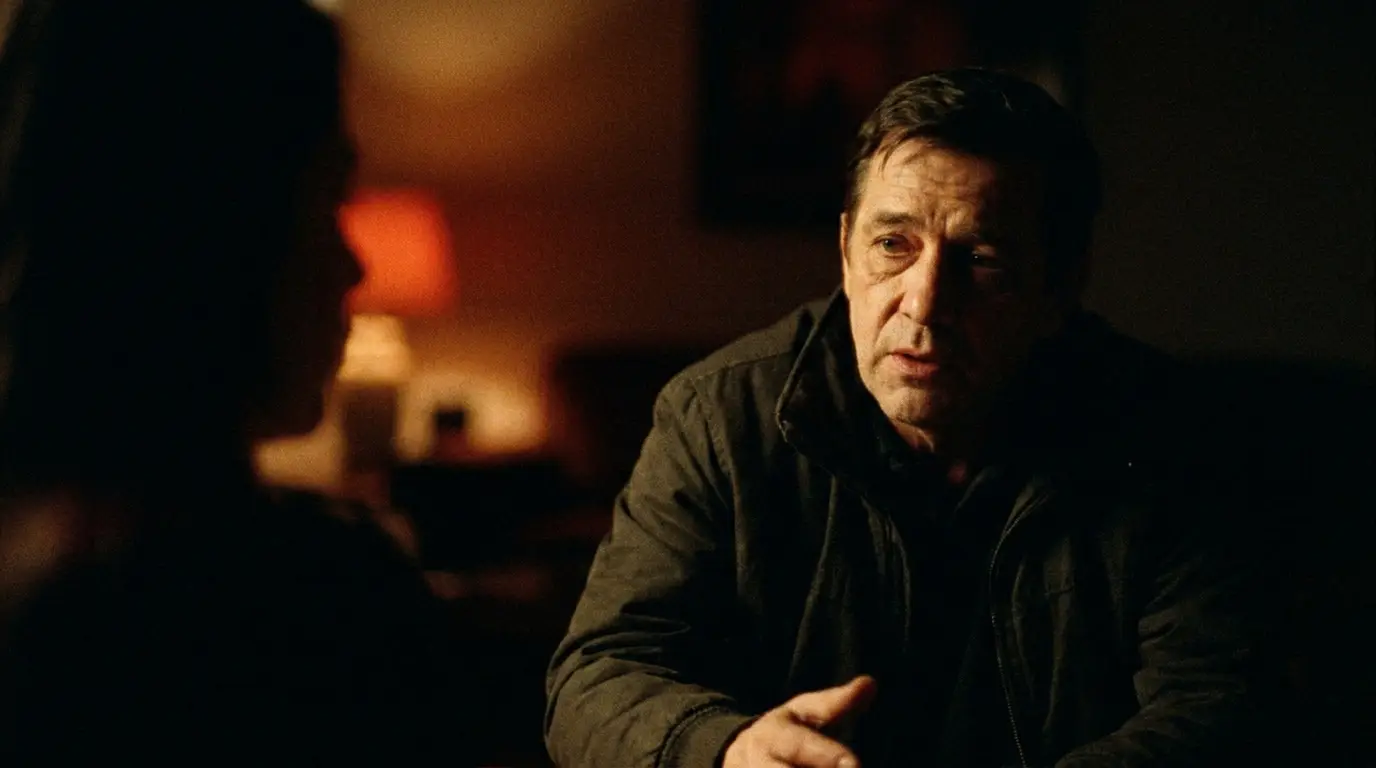
Lighting isn't just technical, it's emotional. High-key lighting (bright, soft, low-contrast) feels open, friendly, and approachable — perfect for a welcoming brand story or a testimonial. Low-key lighting (darker, higher-contrast, deeper shadows) feels serious, premium, and cinematic — great for a moody founder profile or a high-end product piece. Decide the feeling first, then light to match it.
Five Mistakes That Quietly Ruin Interviews
- Overhead office lights. They cast ugly shadows under the eyes ("raccoon eyes"). Turn them off and control your own light.
- Mixing color temperatures. Warm indoor bulbs + cool daylight = a sickly two-toned face. Keep all your light sources the same color.
- Subject too close to the wall. It creates harsh shadows behind them. Pull them a few feet forward for depth.
- Light too low. Lighting from below is "campfire ghost story" light. Keep your key above eye level.
- Forgetting the eyes. A tiny sparkle of reflected light in the eyes ("catchlight") makes a subject look alive. Soft light from the front gives it to you for free.
Quick Interview Lighting Checklist
- Key light: soft, 45° to the side, above eye level
- Fill: soft, about half the key's brightness (or a bounce board)
- Backlight: behind the subject, rimming hair and shoulders
- One big soft source beats three harsh ones
- All lights the same color temperature
- Subject a few feet off the background
- Look for a catchlight in the eyes
"You can shoot on the best camera in the world, but if the light is wrong, it'll still look wrong. Light first — everything else follows."
Light the Way
Great interview lighting isn't about expensive gear — it's about understanding what each light is for and placing it with intention. Start with one soft key, add a fill and a backlight as you grow, and choose your mood on purpose. Do that, and your subjects won't just be visible — they'll look like they belong on screen.
Want interviews that look truly cinematic without the learning curve? That's our happy place. Tell us about your project and we'll bring the lights.
James is a creative professional and marketing leader with 20+ years across film, animation, broadcast production, and brand marketing. He founded MediaMarvels to help businesses tell their stories with a filmmaker's eye and a marketer's mindset.